本文旨在记录从头开始一个Vue项目的步骤和遇到的一些问题及其解决方法~
参考:快速上手 | Vue.js (vuejs.org)
本文首次记录于2023-08-09,使用vue3在本地搭建 Vue 单页应用。创建的项目将使用基于 Vite 的构建设置,使用 Vue 的单文件组件 (SFC)
创建Vue项目
- 安装16.0 或更高版本的 Node.js:
Ubuntu系统升级node可以使用n模块:参考资料Win系统直接在官网下载LTS版安装程序,会自动卸载旧版安装新版
- 确保安装了最新版本的 Node.js,并且当前工作目录正是打算创建项目的目录,在命令行中运行以下命令:
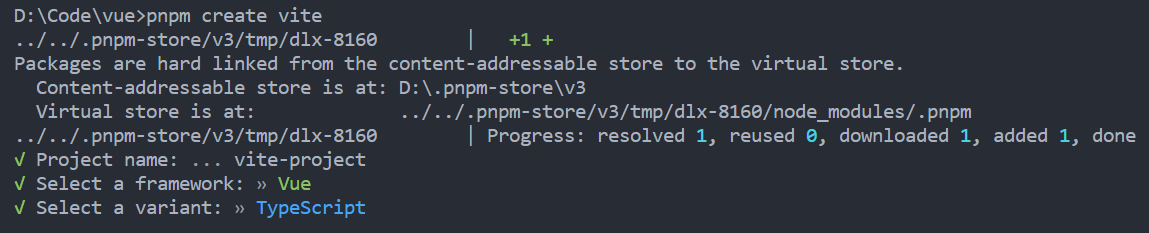
这一指令将会安装并执行 create-vue,它是 Vue 官方的项目脚手架工具。下面将会看到一些诸如 TypeScript 和测试支持之类的可选功能提示:如果不确定是否要开启某个功能,直接按下回车键选择 No
-
若使用VSCode开发,请在VSCode中搜索并安装Volar扩展
-
安装依赖并启动开发服务器:
1
2
3
|
cd <your-project-name>
npm install
npm run dev
|
现在已经运行起来了一个 Vue 项目!
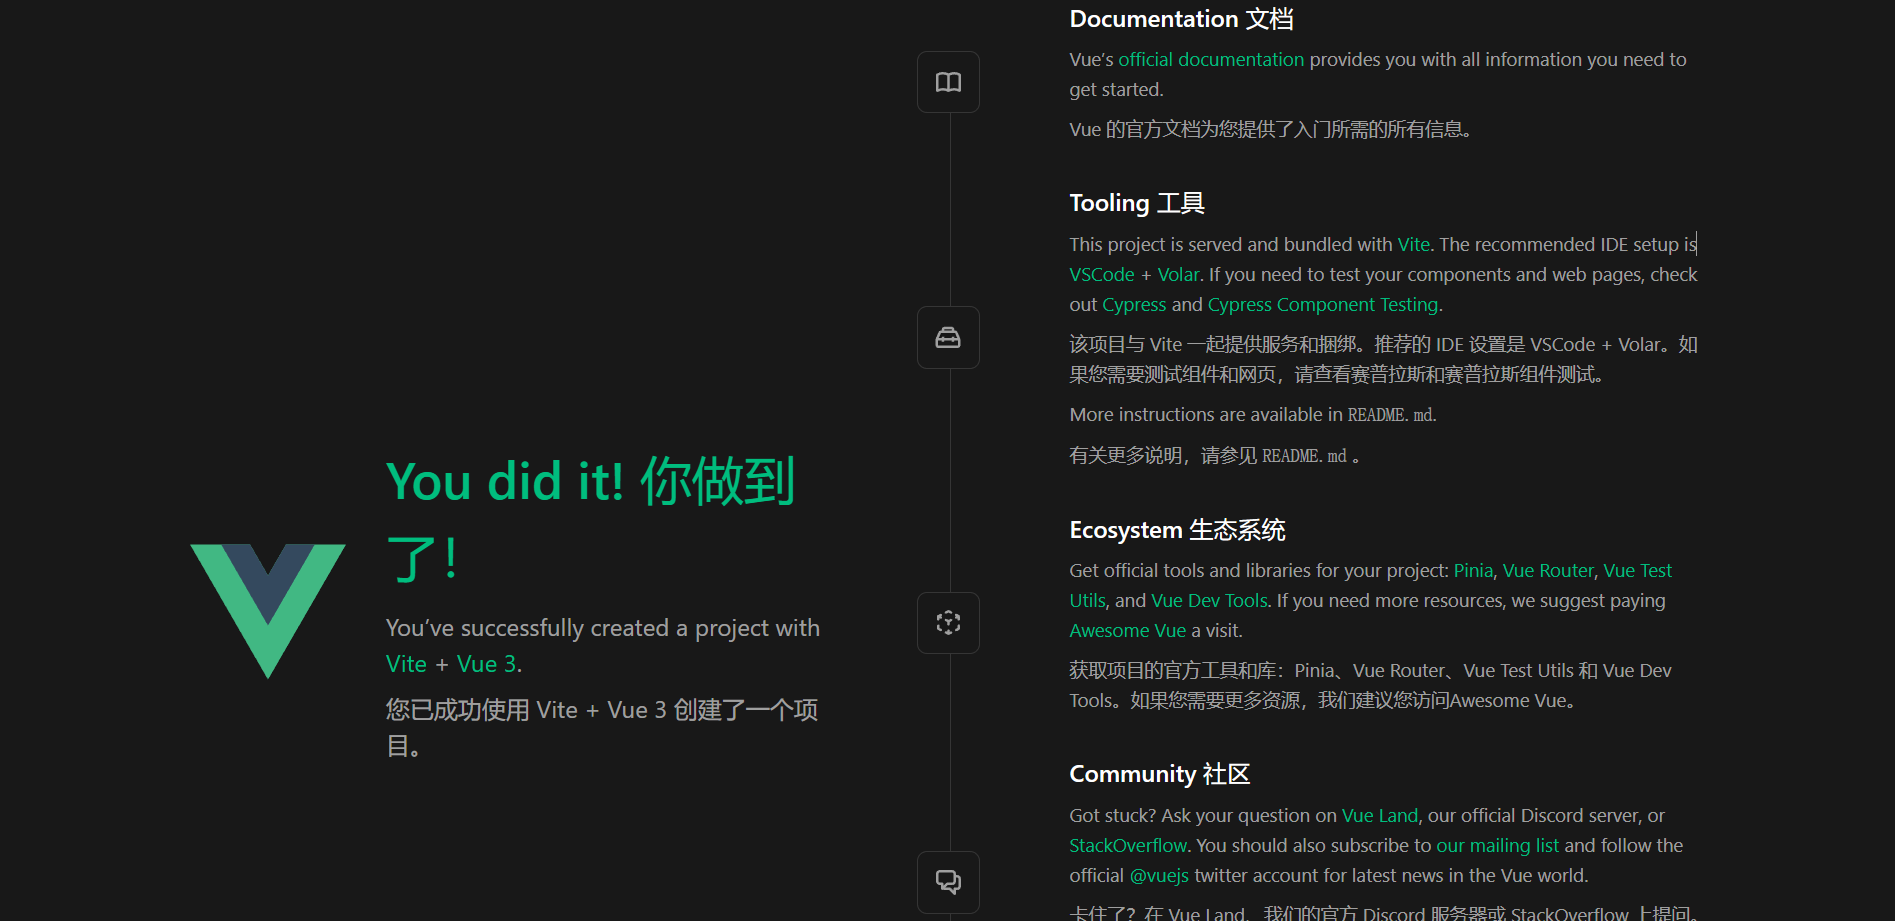
请注意,生成的项目中的示例组件使用的是组合式 API 和 <script setup>,而非选项式 API。下面是一些补充提示:
当准备将应用发布到生产环境时,请运行:
此命令会在 ./dist 文件夹中为应用创建一个生产环境的构建版本。关于将应用上线生产环境的更多内容,请阅读生产环境部署指南。
安装Element-Plus
Element Plus:基于 Vue 3,面向设计师和开发者的组件库
参考:安装 | Element Plus (element-plus.org)
- 使用NPM安装element-plus:
1
|
npm install element-plus --save
|
- 引入element-plus:
 1
 2
 3
 4
 5
 6
 7
 8
 9
10
|
// main.ts
import { createApp } from 'vue'
import ElementPlus from 'element-plus'
import 'element-plus/dist/index.css'
import App from './App.vue'

const app = createApp(App)

app.use(ElementPlus)
app.mount('#app')
|
vue后台管理系统开发流程
偶然发现一优秀专栏,详述了Vue3后台管理系统的搭建流程,为方便自己随时查阅温习,特此记录
原文链接:vue3后台管理系统教程
Gitee地址:guigu-sph-mall-admin: 后台管理系统vue3+vite+typescript+pinia版本
一个项目要有统一的规范,需要使用eslint+stylelint+prettier来对我们的代码质量做检测和修复,需要使用husky来做commit拦截,需要使用commitlint来统一提交规范,需要使用preinstall来统一包管理工具
下面我们就用这一套规范来初始化我们的项目,集成一个规范的模版
环境准备
- node v18.17.0
- pnpm v8.6.12
pnpm安装和使用:
- 使用npm全局安装pnpm:
【BUG】Win下安装后:输入pnpm --version发现cmd报错:‘pnpm‘不是内部或外部命令, 也不是可运行的程序或批处理文件。但是找到nodejs/node_global目录发现是成功安装的
原因:之前更改过npm全局默认安装路径,具体看上文,并且安装了n模块
解决:在系统环境变量的Path中添加之前更改npm全局默认安装路径时新建的node_global路径,然后重启电脑即可
- 设置pnpm镜像源:
1
2
3
|
pnpm config set registry https://registry.npmmirror.com/
# 检查
pnpm config get registry
|
- 【WIN】配置pnpm全局安装路径(WIN的C盘不够用情况下):把替换成PNP全局安装的路径(提前新建对应文件夹)
1
2
3
4
|
pnpm config set global-bin-dir "D:\Program Files\nodejs\.pnpm-store"
pnpm config set cache-dir "D:\Program Files\nodejs\.pnpm-store\cache"
pnpm config set state-dir "D:\Program Files\nodejs\.pnpm-store\state"
pnpm config set global-dir "D:\Program Files\nodejs\.pnpm-store\global"
|
- 验证设置是否正确:如果正确则不输出任何内容, 错误时显示格式化JSON错误项,修改对应错误即可
- 【WIN】配置PNPM环境变量:给PNPM找到配置的全局安装路径
- 设置PNPM环境变量映射:
- 名:
PNPM_HOME
- 值:PNPM global-bin-dir全局安装路径, 例如:
D:\Program Files\nodejs\.pnpm-store
- 系统的
Path变量变量添加%PNPM_HOME%值
- 【WIN】加载配置
- 【WIN】检验:测试设置的路径是否成功
项目初始化
本项目使用vite进行构建,vite官方中文文档参考:Vite 官方中文文档
项目初始化命令:
我们这里选择使用vue+typescript的方式进行初始化
Project name命名为默认vite-project
初始化完成以后进入vite-project目录,
安装依赖
然后运行项目
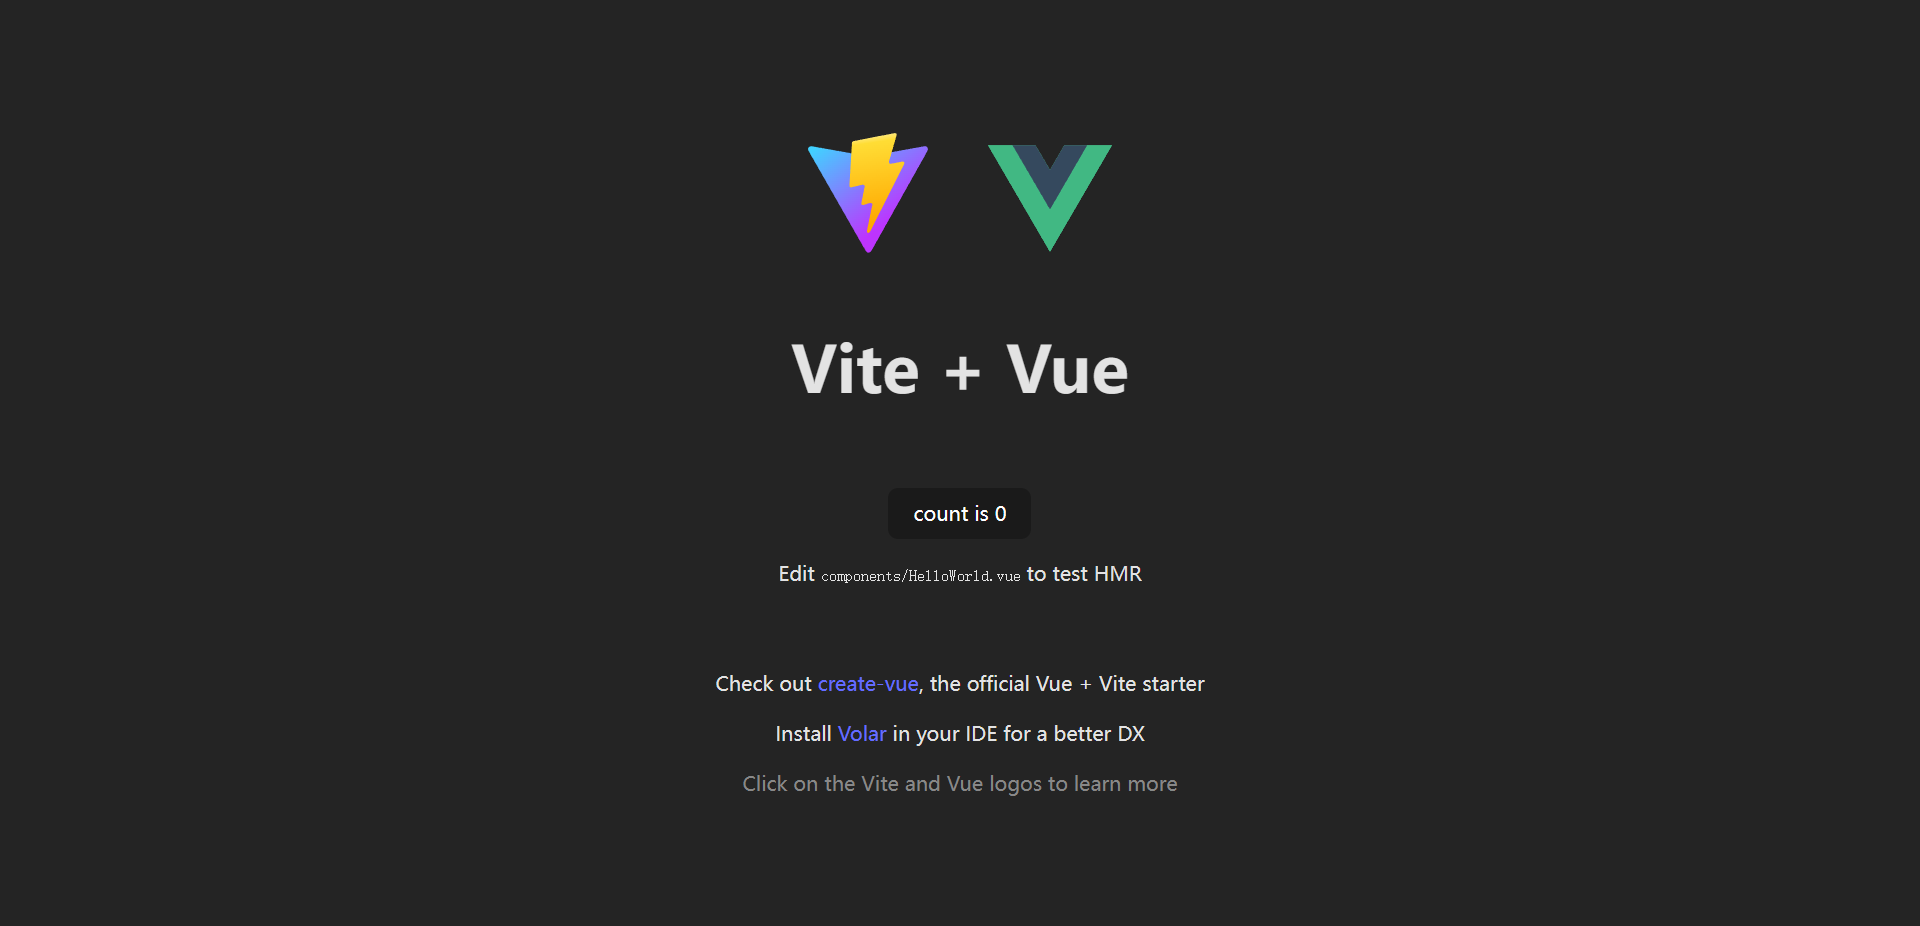
在浏览器打开http://localhost:5173/,即可看到预览效果
[BUG]遇到main.ts报错
解决:
下面的配置本项目不使用,仅供参考学习了解。
一个项目要有统一的规范,需要使用eslint+stylelint+prettier来对代码质量做检测和修复,需要使用husky来做commit拦截,需要使用commitlint来统一提交规范,需要使用preinstall来统一包管理工具。
配置ESLint
本项目不使用
ESLint用来验证js代码是否符合定义的规范
配置prettier
本项目不使用
有了eslint,为什么还要有prettier?
- eslint针对的是javascript,它是一个检测工具,包含js语法以及少部分格式问题,在eslint看来,语法对了就能保证代码正常运行,格式问题属于其次;
- 而prettier属于格式化工具,它看不惯格式不统一,所以它就把eslint没干好的事接着干,另外,prettier支持包含js在内的多种语言
总结起来,eslint和prettier这俩一个保证js代码质量,一个保证代码美观
配置stylelint
本项目不使用
stylelint为css的lint工具。可格式化css代码,检查css语法错误与不合理的写法,指定css书写顺序等
配置保存代码自动修复
本项目不使用
实现每次保存代码时,自动执行lint命令来修复代码的错误。这个操作需要依赖eslint插件来完成,需要提前在vscode插件市场安装好eslint
配置husky
本项目不使用
上面已经集成好了代码校验工具,但是需要每次手动的去执行命令才会格式化的代码。如果有人没有格式化就提交了,那这个规范就没什么用。所以需要强制让开发人员按照代码规范来提交。
要做到这件事情,就需要利用husky在代码提交之前出发git hook,然后执行pnpm format来自动的格式化代码
配置commitlint
本项目不使用
对于的commit信息,也是有统一规范的,不能随便写,要让每个人都按照统一的标准来执行,可以利用commitlint来实现
强制使用pnpm下载包
本项目不使用
为了统一包管理工具,需要强制让用户使用pnpm来安装依赖包
集成pinia+element-plus+vue-router@4
本节涉及到的内容
- 如何配置项目别名
- 如何配置环境变量
- 集成element-plus和自定义Svg图标
- 集成vue-router
- 集成pinia,使用Pinia管理用户信息
- 集成axios
- 集成Mock,如何Mock用户相关的信息,如何使用Token做用户鉴权
- 如何进行全局组件的注册
集成Element-plus
1.安装Element Plus和图标组件
1
|
pnpm install element-plus @element-plus/icons-vue
|
2.全局注册组件
1
2
3
4
5
6
7
|
// main.ts
import ElementPlus from 'element-plus'
import 'element-plus/theme-chalk/index.css'

createApp(App)
    .use(ElementPlus)
    .mount('#app')
|
3.Element Plus全局组件类型声明
1
2
3
4
5
6
7
|
// tsconfig.json
{
  "compilerOptions": {
    // ...
    "types": ["element-plus/global"]
  }
}
|
4.页面使用 Element Plus 组件和图标
 1
 2
 3
 4
 5
 6
 7
 8
 9
10
11
12
13
14
15
16
17
|
<!-- src/App.vue -->
<template>
  <HelloWorld msg="Hello Vue 3 + TypeScript + Vite"/>
  <div style="text-align: center;margin-top: 10px">
    <el-button :icon="Search" circle></el-button>
    <el-button type="primary" :icon="Edit" circle></el-button>
    <el-button type="success" :icon="Check" circle></el-button>
    <el-button type="info" :icon="Message" circle></el-button>
    <el-button type="warning" :icon="Star" circle></el-button>
    <el-button type="danger" :icon="Delete" circle></el-button>
  </div>
</template>

<script lang="ts" setup>
     import HelloWorld from 'src/components/HelloWorld.vue'
     import {Search, Edit,Check,Message,Star, Delete} from '@element-plus/icons-vue'
</script>
|
环境变量配置
- env配置文件
项目根目录分别添加 开发.env.development、生产.env.production和模拟环境.env.test配置文件,文件内容如下
 1
 2
 3
 4
 5
 6
 7
 8
 9
10
11
12
13
14
15
|
# 变量必须以 VITE_ 为前缀才能暴露给外部读取
NODE_ENV = 'development'
VITE_APP_TITLE = 'vite-project'
VITE_APP_PORT = 3002
VITE_APP_BASE_API = '/api'
# 变量必须以 VITE_ 为前缀才能暴露给外部读取
NODE_ENV = 'production'
VITE_APP_TITLE = 'vite-project'
VITE_APP_PORT = 3002
VITE_APP_BASE_API = '/prod-api'
# 变量必须以 VITE_ 为前缀才能暴露给外部读取
NODE_ENV = 'test'
VITE_APP_TITLE = 'vite-project'
VITE_APP_PORT = 3002
VITE_APP_BASE_API = '/test-api'
|
默认运行pnpm run dev的时候NDOE_ENV='development',运行pnpm build的时候NODE_ENV='production',多了一个test环境以后,就需要额外添加一个test环境变量
- 在
package.json配置运行命令
1
2
3
4
5
|
"scripts": {
	"dev": "vite", // dev环境不需要添加 --mode,默认就是 development
    "build:test": "vue-tsc && vite build --mode test",
    "build:pro": "vue-tsc && vite build --mode production",
}
|
- 获取
NODE_ENV,获取环境变量可以通过process.env.NODE_ENV来获取,后面就可以用这个变量来区分不同环境了,在vite.config.ts获取环境变量:
1
2
3
4
5
6
7
8
|
import { defineConfig, loadEnv } from 'vite'
export default defineConfig((config) => {
   // 根据当前工作目录中的 `mode` 加载 .env 文件
  // 设置第三个参数为 '' 来加载所有环境变量,而不管是否有 `VITE_` 前缀。
  const { command, mode } = config
  const env = loadEnv(mode, process.cwd(), '')
  console.log(env.VITE_APP_TITLE)
})
|
通过loadEnv()函数可以获取配置文件中的参数
路径别名配置
- 使用 @ 代替 src
 1
 2
 3
 4
 5
 6
 7
 8
 9
10
11
12
13
14
|
// vite.config.ts
import {defineConfig} from 'vite'
import vue from '@vitejs/plugin-vue'

import path from 'path'

export default defineConfig({
    plugins: [vue()],
    resolve: {
        alias: {
            "@": path.resolve("./src") // 相对路径别名配置,使用 @ 代替 src
        }
    }
})
|
引用path的时候会报类型错误,记得pnpm add -D @types/node,安装完以后会在多一个文件tsconfig.node.json
- TypeScript 编译配置
因为 typescript 特殊的 import 方式 , 需要配置允许默认导入的方式,还有路径别名的配置
 1
 2
 3
 4
 5
 6
 7
 8
 9
10
|
// tsconfig.json
{
  "compilerOptions": {
    "baseUrl": "./", // 解析非相对模块的基地址,默认是当前目录
    "paths": { //路径映射,相对于baseUrl
      "@/*": ["src/*"]
    },
    "allowSyntheticDefaultImports": true // 允许默认导入
  }
}
|
4.别名使用
1
2
3
4
|
// App.vue
import HelloWorld from 'src/components/HelloWorld.vue'
												↓
import HelloWorld from '@/components/HelloWorld.vue'
|
可以直接cmd+鼠标左键跳转到对应的文件目录。
如果遇到无法导入的情况,重启一下vscode
环境变量配置
本项目不使用
SVG图标配置
- 安装依赖
1
2
|
pnpm install vite-plugin-svg-icons -D
pnpm add fast-glob -D
|
- 使用:在
vite.config.ts中配置插件
 1
 2
 3
 4
 5
 6
 7
 8
 9
10
11
12
13
14
15
|
import { createSvgIconsPlugin } from 'vite-plugin-svg-icons'
import path from 'path'

export default () => {
  return {
    plugins: [
      createSvgIconsPlugin({
        // Specify the icon folder to be cached
        iconDirs: [path.resolve(process.cwd(), 'src/assets/icons')],
        // Specify symbolId format
        symbolId: 'icon-[dir]-[name]',
      }),
    ],
  }
}
|
main.ts导入
1
|
import 'virtual:svg-icons-register'
|
- 封装
/src/components/SvgIcon.vue组件
 1
 2
 3
 4
 5
 6
 7
 8
 9
10
11
12
13
14
15
16
17
18
19
20
21
22
23
24
25
26
27
28
29
30
31
32
33
34
35
36
37
38
39
40
41
42
43
44
45
46
47
48
49
50
51
52
53
54
55
56
57
58
59
60
61
62
63
64
65
66
67
68
69
|
<template>
  <svg
    aria-hidden="true"
    :class="['svg-icon', spin && 'svg-icon-spin']"
    :style="getStyle"
  >
    <use :xlink:href="symbolId" :fill="color" />
  </svg>
</template>

<script setup lang="ts">
import { computed } from 'vue'
import type { CSSProperties } from 'vue'
const props = defineProps({
  prefix: {
    type: String,
    default: 'icon',
  },
  name: {
    type: String,
    required: true,
  },
  color: {
    type: String,
    default: '',
  },
  size: {
    type: [Number, String],
    default: 20,
  },
  spin: {
    type: Boolean,
    default: false,
  },
})

const symbolId = computed(() => `#${props.prefix}-${props.name}`)
const getStyle = computed((): CSSProperties => {
  const { size } = props
  let s = `${size}`
  s = `${s.replace('px', '')}px`
  return {
    width: s,
    height: s,
  }
})
</script>

<style scoped>
.svg-icon {
  display: inline-block;
  overflow: hidden;
  vertical-align: -0.15em;
  fill: currentColor;
}
.svg-icon-spin {
  animation: loadingCircle 1s infinite linear;
}

/* 旋转动画 */
@keyframes loadingCircle {
  0% {
    transform: rotate(0);
  }
  100% {
    transform: rotate(360deg);
  }
}
</style>
|
上面定义的Svg组件可以配置以下功能:
从阿里巴巴图标库下载一个刷新icon,如下图:
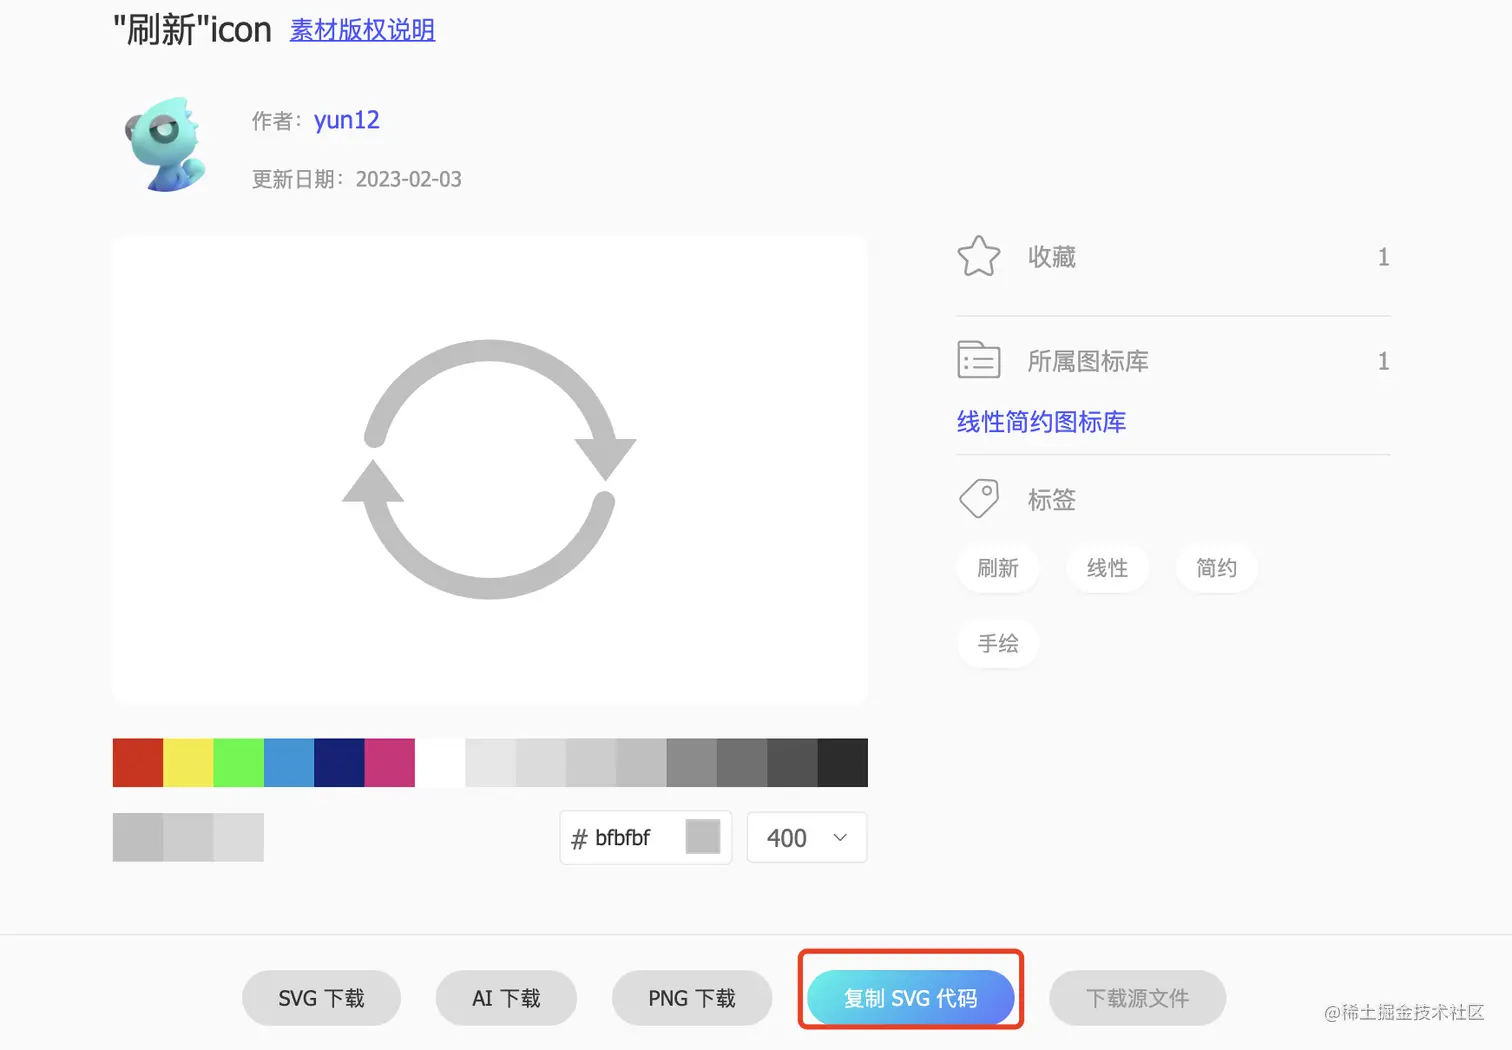
找一个喜欢的图标,然后点击复制SVG代码,在项目目录src/assets/icons下面创建一个refresh.svg文件,然后把刚才复制的代码粘贴到里面。
在App.vue中使用
 1
 2
 3
 4
 5
 6
 7
 8
 9
10
11
|
<template>
  <div>
    <div>
      <svg-icon name="refresh" spin></svg-icon>
    </div>
  </div>
</template>

<script setup lang="ts">
import SvgIcon from '@/components/SvgIcon.vue'
</script>
|
在SvgIcon.vue中可以根据自己的需求更改icon的大小或者颜色,是否让它旋转。而且使用SVG以后,页面上加载的不再是图片资源,而是像下面这样的:

这对页面性能来说是个很大的提升,而且我们SVG文件比img要小的很多,放在项目中几乎不占用资源
集成less
- 安装依赖
- 新建
/src/style.less
 1
 2
 3
 4
 5
 6
 7
 8
 9
10
11
12
13
14
15
16
17
18
19
20
21
22
23
24
25
26
27
28
29
30
31
32
33
34
35
36
37
38
39
40
41
42
43
44
45
46
47
48
49
50
51
52
53
54
55
56
57
58
59
60
61
62
63
64
65
66
67
68
69
70
71
72
73
74
75
76
77
78
79
80
81
82
83
84
|
:root {
  font-size: 16px;
  font-family: Inter, Avenir, Helvetica, Arial, sans-serif;
  // color: rgb(255 255 255 / 87%);
  // background-color: #242424;
  line-height: 24px;
  font-weight: 400;
  color-scheme: light dark;
  font-synthesis: none;
  text-rendering: optimizelegibility;
  -webkit-font-smoothing: antialiased;
  -moz-osx-font-smoothing: grayscale;
  text-size-adjust: 100%;
}

a {
  text-decoration: inherit;
  color: #646cff;
  font-weight: 500;
}

a:hover {
  color: #535bf2;
}

body {
  display: flex;
  margin: 0;
  min-width: 320px;
  min-height: 100vh;
  place-items: center;
}

h1 {
  font-size: 3.2em;
  line-height: 1.1;
}

button {
  padding: 0.6em 1.2em;
  font-size: 1em;
  font-family: inherit;
  background-color: #1a1a1a;
  border: 1px solid transparent;
  border-radius: 8px;
  transition: border-color 0.25s;
  font-weight: 500;
  cursor: pointer;
}

button:hover {
  border-color: #646cff;
}

button:focus,
button:focus-visible {
  outline: 4px auto -webkit-focus-ring-color;
}

.card {
  padding: 2em;
}

#app {
  padding: 2rem;
  margin: 0 auto;
  max-width: 1280px;
  text-align: center;
}

@media (prefers-color-scheme: light) {
  :root {
    color: #213547;
    // background-color: #fff;
  }

  a:hover {
    color: #747bff;
  }

  button {
    // background-color: #f9f9f9;
  }
}
|
- 在
main.ts中
全局注册组件
上面的SvgIcon组件在使用的时候都需要手动的引入,在自定义的组件很多的情况下就显得很不方便,所以将上面的组件改造一下,使用全局注册的方式。
定义组件改造,我们把组件目录修改成/components/SvgIcon/src/SvgIcon.vue
在/components/SvgIcon下新建一个index.ts文件,暴露出组件
1
2
|
import SvgIcon from './src/SvgIcon.vue'
export { SvgIcon }
|
在components下新建index.ts文件,用来把所有的组件引入,然后提供一个install方法
 1
 2
 3
 4
 5
 6
 7
 8
 9
10
11
12
13
14
15
16
17
|
import type { App, Component } from 'vue'

// 当组件很多的时候,可以使用
import { SvgIcon } from './SvgIcon'

// 这个地方
const Components: {
  [propName: string]: Component
} = { SvgIcon }

export default {
  install: (app: App) => {
    Object.keys(Components).forEach((key) => {
      app.component(key, Components[key])
    })
  },
}
|
install是专门用来提供安装插件的一个方法,这样我们就可以使用app.use()用来注册所有的全局组件了。
在main.ts中
 1
 2
 3
 4
 5
 6
 7
 8
 9
10
|
import { createApp } from 'vue'
import './style.less'
import App from './App.vue'
import registerGlobComp from '@/components'

const app = createApp(App)

app.use(registerGlobComp)

app.mount('#app')
|
这样在App.vue中使用SvgIcon组件的时候,就不用再引入一次了
 1
 2
 3
 4
 5
 6
 7
 8
 9
10
|
<template>
   <svg-icon name="refresh" spin></svg-icon>
</template>

<script setup lang="ts">
// import SvgIcon from '@/components/SvgIcon/src/SvgIcon.vue'
</script>

<style scoped lang="less">
</style>
|
集成Mock
- 安装依赖
1
|
pnpm add -D vite-plugin-mock@2.9.6 mockjs
|
- 在 vite.config.ts 配置文件启用插件:Mock 服务通常只用于开发阶段,因此我们需要在配置文件中判断当前所处环境。
在 webpack 中通常会配置一个NODE_ENV的环境变量。而在 Vite 中,不用开发者进行设置,它提供了一种方便的判断开发环境和生产环境的方式,如下:
 1
 2
 3
 4
 5
 6
 7
 8
 9
10
11
12
13
14
15
16
|
import { defineConfig } from 'vite'
import vue from '@vitejs/plugin-vue'
import { viteMockServe } from 'vite-plugin-mock'

export default defineConfig((config) => {
  const { command } = config
  return {
    plugins: [
      vue(),
      viteMockServe({
        // 只在开发阶段开启 mock 服务
        localEnabled: command === 'serve'
      })
    ]
  }
})
|
dev环境下command='serve',build环境下command='build'
- 创建API:在根目录创建
mock文件夹,然后创建user.ts文件,添加用户相关的接口
 1
 2
 3
 4
 5
 6
 7
 8
 9
10
11
12
13
14
15
16
17
18
19
20
21
22
23
24
25
26
27
28
29
30
31
32
33
34
35
36
37
38
39
40
41
42
43
44
45
46
47
48
49
50
51
52
53
54
55
56
57
58
59
60
61
62
63
64
65
66
67
68
69
70
71
72
73
74
75
76
77
78
79
80
81
|
import { resultError, resultSuccess, getRequestToken } from './_utils'
// mock/user.ts

function createUserList() {
  return [
    {
      userId: 1,
      avatar:
        'https://wpimg.wallstcn.com/f778738c-e4f8-4870-b634-56703b4acafe.gif',
      username: 'admin',
      password: '111111',
      desc: '平台管理员',
      roles: ['平台管理员'],
      buttons: ['cuser.detail'],
      routes: ['home'],
      token: 'Admin Token',
    },
    {
      userId: 2,
      avatar:
        'https://wpimg.wallstcn.com/f778738c-e4f8-4870-b634-56703b4acafe.gif',
      username: 'system',
      password: '111111',
      desc: '系统管理员',
      roles: ['系统管理员'],
      buttons: ['cuser.detail', 'cuser.user'],
      routes: ['home'],
      token: 'System Token',
    },
  ]
}

export default [
  // 用户登录
  {
    url: '/api/user/login',
    method: 'post',
    response: ({ body }) => {
      const { username, password } = body
      const checkUser = createUserList().find(
        (item) => item.username === username && item.password === password,
      )
      if (!checkUser) {
        return resultError('Incorrect username or password!')
      }
      const { token } = checkUser
      return resultSuccess({
        token,
      })
    },
  },
  // 获取用户信息
  {
    url: '/api/user/info',
    method: 'get',
    response: (request) => {
      const token = getRequestToken(request)
      console.log(token)

      const checkUser = createUserList().find((item) => item.token === token)
      if (!checkUser) {
        return resultError(
          'The corresponding user information was not obtained!',
        )
      }
      return resultSuccess(checkUser)
    },
  },
  // 一个失败的请求
  {
    url: '/api/error',
    method: 'get',
    response: () => {
      return {
        code: 1,
        message: '密码错误',
        data: null,
      }
    },
  },
]
|
上面写了两个接口,第一个是用户登陆接口,接收username和password参数,然后在createUserList()做匹配,返回给前端。第二个是获取用户信息接口,接收token,然后从headers从拿到token信息,再从createUserList()做匹配,返回给前端。
然后就可以直接跟正常请求api一样,去请求对应的接口了,接下来封装一下axios,然后测试mock接口
集成Axios
使用typescript二次封装Axios
- 安装依赖
- axios封装放在目录
src/utils/http下面,创建一个index.ts文件
  1
  2
  3
  4
  5
  6
  7
  8
  9
 10
 11
 12
 13
 14
 15
 16
 17
 18
 19
 20
 21
 22
 23
 24
 25
 26
 27
 28
 29
 30
 31
 32
 33
 34
 35
 36
 37
 38
 39
 40
 41
 42
 43
 44
 45
 46
 47
 48
 49
 50
 51
 52
 53
 54
 55
 56
 57
 58
 59
 60
 61
 62
 63
 64
 65
 66
 67
 68
 69
 70
 71
 72
 73
 74
 75
 76
 77
 78
 79
 80
 81
 82
 83
 84
 85
 86
 87
 88
 89
 90
 91
 92
 93
 94
 95
 96
 97
 98
 99
100
101
102
103
|
import axios from 'axios'
import type {
  AxiosInstance,
  AxiosError,
  AxiosRequestConfig,
  AxiosResponse,
} from 'axios'
import { ElMessage } from 'element-plus'
import { localGet } from '../cache'
import { TOKEN_KEY } from '../../enums/cacheEnum'

const service: AxiosInstance = axios.create({
  baseURL: '/api',
  timeout: 0,
})

/* 请求拦截器 */
service.interceptors.request.use(
  (config) => {
    const token = localGet(TOKEN_KEY)
    if (token) {
      config.headers.Authorization = `${token}`
    }
    return config
  },
  (error: AxiosError) => {
    ElMessage.error(error.message)
    return Promise.reject(error)
  },
)

/* 响应拦截器 */
service.interceptors.response.use(
  (response: AxiosResponse) => {
    const { code, message, data } = response.data

    // 根据自定义错误码判断请求是否成功
    if (code === 0) {
      // 将组件用的数据返回
      return data
    } else {
      // 处理业务错误。
      ElMessage.error(message)
      return Promise.reject(new Error(message))
    }
  },
  (error: AxiosError) => {
    // 处理 HTTP 网络错误
    let message = ''
    // HTTP 状态码
    const status = error.response?.status
    switch (status) {
      case 401:
        message = 'token 失效,请重新登录'
        // 这里可以触发退出的 action
        break
      case 403:
        message = '拒绝访问'
        break
      case 404:
        message = '请求地址错误'
        break
      case 500:
        message = '服务器故障'
        break
      default:
        message = '网络连接故障'
    }

    ElMessage.error(message)
    return Promise.reject(error)
  },
)

/* 导出封装的请求方法 */
const http = {
  get<T = any>(url: string, config?: AxiosRequestConfig): Promise<T> {
    return service.get(url, config)
  },

  post<T = any>(
    url: string,
    data?: object,
    config?: AxiosRequestConfig,
  ): Promise<T> {
    return service.post(url, data, config)
  },

  put<T = any>(
    url: string,
    data?: object,
    config?: AxiosRequestConfig,
  ): Promise<T> {
    return service.put(url, data, config)
  },

  delete<T = any>(url: string, config?: AxiosRequestConfig): Promise<T> {
    return service.delete(url, config)
  },
}

export default http
|
集成Pinia
- 安装依赖
- 引入pinia:创建文件
store/index.ts,添加如下内容
1
2
3
|
import { createPinia } from 'pinia'
const pinia = createPinia()
export default pinia
|
- 在
main.ts中使用
 1
 2
 3
 4
 5
 6
 7
 8
 9
10
11
12
13
14
15
16
|
import { createApp } from 'vue'
import './style.css'
import App from './App.vue'
import ElementPlus from 'element-plus'
import 'element-plus/theme-chalk/index.css'
import 'virtual:svg-icons-register'
import registerGlobComp from '@/components'
import pinia from '@/store'

const app = createApp(App)

app.use(ElementPlus)
app.use(registerGlobComp)
app.use(pinia)

app.mount('#app')
|
- 新建
store/modules/user.ts封装userState信息:这里使用pinia对用户信息的操作封装了一下,登陆成功以后,会缓存token或者用户信息
 1
 2
 3
 4
 5
 6
 7
 8
 9
10
11
12
13
14
15
16
17
18
19
20
21
22
23
24
25
26
27
28
29
30
31
32
33
34
35
36
37
38
39
40
41
42
43
44
45
46
47
48
49
50
51
|
import { defineStore } from 'pinia'
import { login, getUserInfo } from '@/api'
import { LoginParams } from './model/userModel'
import { localSet, localGet } from '@/utils/cache'
import { TOKEN_KEY, USER_INFO_KEY } from '@/enums/cacheEnum'
import type { UserState } from './model/userModel'
import type { UserInfo } from '@/types/store'
export const useUserStore = defineStore({
  id: 'app-user',
  state: (): UserState => ({
    userInfo: null,
    token: undefined,
  }),
  getters: {
    getUserInfo(): UserInfo {
      return (this.userInfo as UserInfo) || localGet(USER_INFO_KEY) || {}
    },
    getToken(): string {
      return (this.token as string) || localGet(TOKEN_KEY) || ''
    },
  },
  actions: {
    setToken(token: string | undefined) {
      this.token = token ? token : ''
      localSet(TOKEN_KEY, token)
    },
    setUserInfo(info: UserInfo) {
      this.userInfo = info
      localSet(USER_INFO_KEY, info)
    },
    async login(params: LoginParams) {
      try {
        const data = await login(params)

        const { token } = data
        this.setToken(token)
        this.getUserInfoAction()
      } catch (error) {
        return Promise.reject(error)
      }
    },
    async getUserInfoAction() {
      try {
        const data = await getUserInfo()
        this.setUserInfo(data)
      } catch (error) {
        return Promise.reject(error)
      }
    },
  },
})
|
- 使用
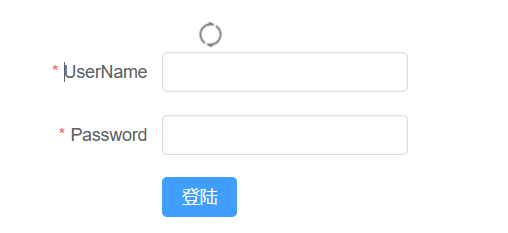
useUserStroe:在src/views/login/index.vue页面,添加下面逻辑
 1
 2
 3
 4
 5
 6
 7
 8
 9
10
11
12
13
14
15
16
|
import { useUserStore } from '@/store/modules/user'
const userStore = useUserStore()

const submitForm = (formEl: FormInstance | undefined) => {
  if (!formEl) return
  formEl.validate((valid) => {
    if (valid) {
      userStore.login({
        ...ruleForm,
      })
    } else {
      console.log('error submit!')
      return false
    }
  })
}
|
每个我们定义的pinia,比如上面的useUserStore,都有一个唯一的id:app-user(不允许重复),在vue文件中使用的时候,可以通过const userStore = useUserStore(),获取到对应store的所有信息,包活state、action、gettter等。比之前的vuex简单多了
集成router
官方文档:Vue Router | The official Router for Vue.js (vuejs.org)
- 安装
vue-router
- 路由实例全局注册
1
2
3
4
5
6
7
8
|
// main.ts
import router from "@/router";

const app = createApp(App)

app.use(router)

app.mount('#app')
|
- 创建路由实例
 1
 2
 3
 4
 5
 6
 7
 8
 9
10
11
12
13
14
15
16
17
18
19
20
21
22
23
24
25
26
|
import { createRouter, createWebHashHistory, RouteRecordRaw } from 'vue-router'
export const constantRoutes: Array<RouteRecordRaw> = [
{
path: '/',
component: () => import('@/views/home/index.vue'),
},
{
path: '/login',
component: () => import('@/views/login/index.vue'),
},
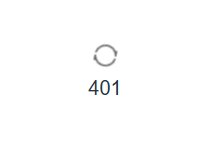
{
path: '/401',
component: () => import('@/views/error-page/index.vue'),
},
]
// 创建路由实例
const router = createRouter({
history: createWebHashHistory(),
routes: constantRoutes as RouteRecordRaw[],
// 刷新时,滚动条位置还原
scrollBehavior: () => ({ left: 0, top: 0 }),
})
export default router
|
- 修改
App.vue
 1
 2
 3
 4
 5
 6
 7
 8
 9
10
11
12
13
14
15
16
17
18
19
20
21
22
23
24
25
26
27
28
29
|
<template>
  <div>
    <div>
      <svg-icon name="refresh" spin></svg-icon>
      <router-view></router-view>
    </div>
  </div>
</template>

<script setup lang="ts">
// import SvgIcon from '@/components/SvgIcon/src/SvgIcon.vue'
</script>

<style scoped lang="less">
.logo {
  padding: 1.5em;
  height: 6em;
  will-change: filter;
}

.logo:hover {
  filter: drop-shadow(0 0 2em #646cffaa);
}

.logo.vue:hover {
  filter: drop-shadow(0 0 2em #42b883aa);
}
</style>
|
在页面访问/、/login、/401路由的时候已经切换了。

上面的文字版增量式开发自学吃力,下面跟着视频教程重新开始,具体看下篇Vue项目实战