返回

Vue学习笔记|Vue脚手架

初始化脚手架

  • Vue 脚手架是 Vue 官方提供的标准化开发工具(开发平台)
  • 文档: https://cli.vuejs.org/zh/
  • 第一步(仅第一次执行):全局安装@vue/cli
1
npm install -g @vue/cli
  • 第二步:切换到你要创建项目的目录,然后使用命令创建项目
1
vue create xxxx 
  • 第三步:启动项目
1
npm run serve 

备注:

  • 如出现下载缓慢请配置 npm 淘宝镜像:
1
npm config set registry https://registry.npm.taobao.org
  • Vue 脚手架隐藏了所有 webpack 相关的配置,若想查看具体的 webpack 配置, 请执行:
1
vue inspect > output.js

脚手架文件结构

 1
 2
 3
 4
 5
 6
 7
 8
 9
10
11
12
13
14
15
16
├── node_modules 
├── public
│   ├── favicon.ico: 页签图标
│   └── index.html: 主页面
├── src
│   ├── assets: 存放静态资源
│   │   └── logo.png
│   │── component: 存放组件
│   │   └── HelloWorld.vue
│   │── App.vue: 汇总所有组件
│   │── main.js: 入口文件
├── .gitignore: git版本管制忽略的配置
├── babel.config.js: babel的配置文件
├── package.json: 应用包配置文件 
├── README.md: 应用描述文件
├── package-lock.json:包版本控制文件
  • publicsrcmain.js等文件名,事先是在配置文件中配置好的,尽量别用其他名字;若要使用其他文件名,需要修改配置文件

render函数

  • vue.jsvue.runtime.xxx.js的区别:

    • vue.js是完整版的Vue,包含:核心功能+模板解析器
    • vue.runtime.xxx.js是运行版的Vue,只包含:核心功能;没有模板解析器
  • 因为vue.runtime.xxx.js没有模板解析器,所以不能使用template配置项,需要使用 render函数接收到的createElement函数去指定具体内容

  • index.html

1
2
<!--容器-->
<div id="app"></div>
  • main.js
 1
 2
 3
 4
 5
 6
 7
 8
 9
10
11
12
13
14
15
16
/* 
	该文件是整个项目的入口文件
*/
//引入Vue
import Vue from 'vue'
//引入App组件,它是所有组件的父组件
import App from './App.vue'
//关闭vue的生产提示
Vue.config.productionTip = false

//创建Vue实例对象---vm
new Vue({
    el:'#app',
    //render函数完成了这个功能:将App组件放入容器中
    render: h => h(App),
})
  • App.vue
 1
 2
 3
 4
 5
 6
 7
 8
 9
10
11
12
13
14
15
16
17
18
19
20
21
<template>
	<div>
    	<img src="./assets/logo.png" alt="logo">
    	<School></School>
    	<Student></Student>
    </div>
</template>

<script>
    //引入组件
    import School from './components/SchoolName'
    import Student from './components/StudentName'

    export default {
        name:'App',
        components:{
            School,
            Student
        }
    }
</script>
  • SchoolName.vue
 1
 2
 3
 4
 5
 6
 7
 8
 9
10
11
12
13
14
15
16
17
18
19
20
21
22
23
24
25
26
27
28
29
30
<template>
	<div class="demo">
        <h2>学校名称{{ name }}</h2>
        <h2>学校地址{{ address }}</h2>
        <button @click="showName">点我提示学校名</button>
    </div>
</template>

<script>
    export default {
        name: 'SchoolName',
        data() {
            return {
                name: 'xaut',
                address: 'xian'
            }
        },
        methods: {
            showName() {
                alert(this.name)
            }
        },
    }
</script>

<style>
    .demo {
        background-color: orange;
    }
</style>
  • StudentName.vue
 1
 2
 3
 4
 5
 6
 7
 8
 9
10
11
12
13
14
15
16
17
18
<template>
	<div>
        <h2>学生姓名{{ name }}</h2>
        <h2>学生年龄{{ age }}</h2>
    </div>
</template>

<script>
    export default {
        name: 'StudentName',
        data() {
            return {
                name: '张三',
                age: 18
            }
        }
    }
</script>

vue.config.js配置文件

  • 使用vue inspect > output.js命令可以查看到Vue脚手架的默认配置。
  • 使用vue.config.js文件可以对脚手架进行个性化定制,详情见:配置参考 | Vue CLI (vuejs.org)
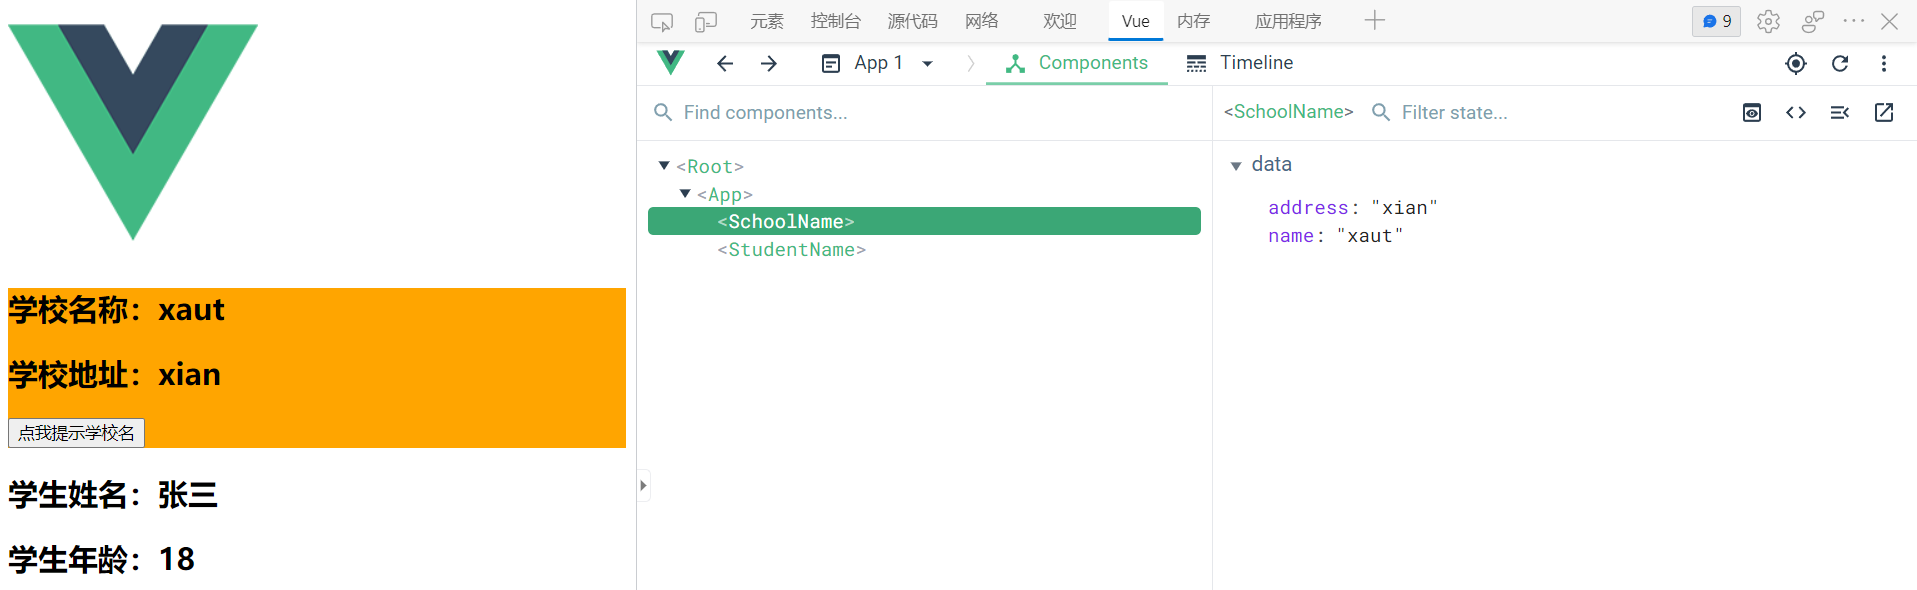
ref标签属性

  • 被用来给元素子组件注册引用信息(id的替代者)

  • 应用在html标签上获取的是真实DOM元素,应用在组件标签上是组件实例对象(vc)

  • 使用方式:

    • 打标识:<h1 ref="xxx">.....</h1><School ref="xxx"></School>
    • 获取:this.$refs.xxx
  • App.vue

 1
 2
 3
 4
 5
 6
 7
 8
 9
10
11
12
13
14
15
16
17
18
19
20
21
22
23
24
25
26
27
28
29
<template>
	<div>
    	<h1 v-text="msg" ref="title"></h1>
    	<button ref="btn" @click="showDOM">点我输出上方的DOM元素</button>
    	<School ref="sch"/>
    </div>
</template>

<script>
    //引入School组件
    import School from './components/School'

    export default {
        name:'App',//该组件名称
        components:{School},//注册该组件的子组件
        data() {
            return {
                msg:'欢迎学习Vue!'
            }
        },
        methods: {
            showDOM(){
                console.log(this.$refs.title) //真实DOM元素
                console.log(this.$refs.btn) //真实DOM元素
                console.log(this.$refs.sch) //School组件的实例对象(vc)
            }
        },
    }
</script>

props配置项

  • 功能:让组件接收外部传过来的数据

  • 传递数据:直接在外部组件标签中配置<Demo name="xxx"/>

  • 接收数据:

    • 第一种方式(只接收):props:['name']
    • 第二种方式(限制类型):props:{name:String}
    • 第三种方式(限制类型、限制必要性、指定默认值):
1
2
3
4
5
6
7
props:{
	name:{
	type:String, //类型
	required:true, //必要性
	default:'老王' //默认值
	}
}

备注:props是只读的,Vue底层会监测你对props的修改,如果进行了修改,就会发出警告,若业务需求确实需要修改,那么请复制props的内容到data中一份,然后去修改data中的数据。

  • App.vue
 1
 2
 3
 4
 5
 6
 7
 8
 9
10
11
12
13
14
<template>
	<div>
   		<Student name="李四" sex="女" :age="18"/>
    </div>
</template>

<script>
    import Student from './components/Student'

    export default {
        name:'App',
        components:{Student}
    }
</script>
  • :age:动态绑定,""中是表达式;若不加:,则""中是字符串

  • Student.vue

 1
 2
 3
 4
 5
 6
 7
 8
 9
10
11
12
13
14
15
16
17
18
19
20
21
22
23
24
25
26
27
28
29
30
31
32
33
34
35
36
37
38
39
40
41
42
43
44
45
46
47
48
49
50
51
52
<template>
    <div>
        <h1>{{msg}}</h1>
        <h2>学生姓名{{name}}</h2>
        <h2>学生性别{{sex}}</h2>
        <h2>学生年龄{{myAge+1}}</h2>
        <button @click="updateAge">尝试修改收到的年龄</button>
	</div>
</template>

<script>
    export default {
        name:'Student',
        data() {
            console.log(this)
            return {
                msg:'我是一个xaut的学生',
                myAge:this.age
            }
        },
        methods: {
            updateAge(){
                this.myAge++
            }
        },
        //简单声明接收
        // props:['name','age','sex'] 

        //接收的同时对数据进行类型限制
        /* props:{
			name:String,
			age:Number,
			sex:String
		} */

        //接收的同时对数据:进行类型限制+默认值的指定+必要性的限制
        props:{
            name:{
                type:String, //name的类型是字符串
                required:true, //name是必要的
            },
            age:{
                type:Number,
                default:99 //默认值
            },
            sex:{
                type:String,
                required:true
            }
        }
    }
</script>
  • 执行时先pros,后data(),所以this.age可以获取到vc中的age

mixin混入

  • 功能:可以把多个组件共用的配置提取成一个混入对象

使用方式:

  • 第一步定义混合:
1
2
3
4
5
{
    data(){....},
    methods:{....}
    ....
}
  • 第二步使用混入:
    • 全局混入:Vue.mixin(xxx)
    • 局部混入:mixins:['xxx']

注:datamethod组件自己有定义时,以组件自己的为准;生命周期钩子若组件和混入都有定义,则都起作用

ES6 模块

  • mixin.js
 1
 2
 3
 4
 5
 6
 7
 8
 9
10
11
12
13
14
15
16
17
18
export const hunhe = {
    methods: {
        showName(){
            alert(this.name)
        }
    },
    mounted() {
        console.log('你好啊!')
    },
}
export const hunhe2 = {
    data() {
        return {
            x:100,
            y:200
        }
    },
}
  • main.js
1
2
Vue.mixin(hunhe)
Vue.mixin(hunhe2)
  • School.vue
 1
 2
 3
 4
 5
 6
 7
 8
 9
10
11
12
13
14
15
16
17
18
19
20
21
22
23
<template>
<div>
    <h2 @click="showName">学校名称{{name}}</h2>
    <h2>学校地址{{address}}</h2>
    </div>
</template>

<script>
    //引入一个hunhe
    import {hunhe,hunhe2} from '../mixin'

    export default {
        name:'School',
        data() {
            return {
                name:'xaut',
                address:'xian',
                x:666
            }
        },
        mixins:[hunhe,hunhe2],
    }
</script>
  • Student.vue
 1
 2
 3
 4
 5
 6
 7
 8
 9
10
11
12
13
14
15
16
17
18
19
20
21
<template>
	<div>
    	<h2 @click="showName">学生姓名{{name}}</h2>
    	<h2>学生性别{{sex}}</h2>
    </div>
</template>

<script>
    import {hunhe,hunhe2} from '../mixin'

    export default {
        name:'Student',
        data() {
            return {
                name:'张三',
                sex:'男'
            }
        },
        mixins:[hunhe,hunhe2]
    }
</script>

插件

  • 功能:用于增强Vue
  • 本质:包含install方法的一个对象,install的第一个参数是Vue,第二个以后的参数是插件使用者传递的数据
  • 定义插件:
 1
 2
 3
 4
 5
 6
 7
 8
 9
10
11
12
13
14
对象.install = function (Vue, options) {
    // 1. 添加全局过滤器
    Vue.filter(....)

    // 2. 添加全局指令
    Vue.directive(....)

    // 3. 配置全局混入(合)
    Vue.mixin(....)

    // 4. 添加实例方法
    Vue.prototype.$myMethod = function () {...}
    Vue.prototype.$myProperty = xxxx
}
  • 使用插件:Vue.use()

  • plugins.js

 1
 2
 3
 4
 5
 6
 7
 8
 9
10
11
12
13
14
15
16
17
18
19
20
21
22
23
24
25
26
27
28
29
30
31
32
33
34
35
36
37
38
export default {
	install(Vue,x,y,z){
		console.log(x,y,z)
		//全局过滤器
		Vue.filter('mySlice',function(value){
			return value.slice(0,4)
		})

		//定义全局指令(自动获取焦点)
		Vue.directive('fbind',{
			//指令与元素成功绑定时(一上来)
			bind(element,binding){
				element.value = binding.value
			},
			//指令所在元素被插入页面时
			inserted(element,binding){
				element.focus()
			},
			//指令所在的模板被重新解析时
			update(element,binding){
				element.value = binding.value
			}
		})

		//定义混入
		Vue.mixin({
			data() {
				return {
					x:100,
					y:200
				}
			},
		})

		//给Vue原型上添加一个方法(vm和vc就都能用了)
		Vue.prototype.hello = ()=>{alert('你好啊')}
	}
}
  • main.js
1
2
3
4
//引入插件
import plugins from './plugins'
//应用(使用)插件
Vue.use(plugins,1,2,3)
  • School.vue
 1
 2
 3
 4
 5
 6
 7
 8
 9
10
11
12
13
14
15
16
17
18
19
20
21
22
23
24
<template>
    <div>
        <h2>学校名称{{name | mySlice}}</h2>
        <h2>学校地址{{address}}</h2>
        <button @click="test">点我测试一个hello方法</button>
    </div>
</template>

<script>
    export default {
        name:'School',
        data() {
            return {
                name:'xaut1234',
                address:'xian',
            }
        },
        methods: {
            test(){
                this.hello()
            }
        },
    }
</script>
  • Student.vue
 1
 2
 3
 4
 5
 6
 7
 8
 9
10
11
12
13
14
15
16
17
18
19
<template>
	<div>
        <h2>学生姓名{{name}}</h2>
        <h2>学生性别{{sex}}</h2>
        <input type="text" v-fbind:value="name">
	</div>
</template>

<script>
    export default {
        name:'Student',
        data() {
            return {
                name:'张三',
                sex:'男'
            }
        },
    }
</script>

Scoped样式

  1. 作用:让css样式在局部生效,防止冲突。
  2. 写法:<style scoped>
  • School.vue
 1
 2
 3
 4
 5
 6
 7
 8
 9
10
11
12
13
14
15
16
17
18
19
20
21
22
23
24
<template>
	<div class="demo">
    	<h2 class="title">学校名称{{name}}</h2>
    	<h2>学校地址{{address}}</h2>
    </div>
</template>

<script>
    export default {
        name:'School',
        data() {
            return {
                name:'xaut',
                address:'xian',
            }
        }
    }
</script>

<style scoped>
    .demo{
        background-color: skyblue;
    }
</style>
  • Student.vue
 1
 2
 3
 4
 5
 6
 7
 8
 9
10
11
12
13
14
15
16
17
18
19
20
21
22
23
24
<template>
	<div class="demo">
    	<h2 class="title">学生姓名{{name}}</h2>
    	<h2 class="atguigu">学生性别{{sex}}</h2>
    </div>
</template>

<script>
    export default {
        name:'Student',
        data() {
            return {
                name:'张三',
                sex:'男'
            }
        }
    }
</script>

<style scoped>
    .demo{
        background-color: orange;
    }
</style>

Todo-list案例

  • 场景:类似手机备忘录,

  • 需求:

    • 可在输入框添加待办到列表
    • 待办列表前勾选框可勾选已完成事项,后面按钮可删除该事项
    • 下方有统计数据和全体事项的勾选取消功能
  • 组件化编码流程:

    ​ (1).拆分静态组件:组件要按照功能点拆分,命名不要与html元素冲突。

    ​ (2).实现动态组件:考虑好数据的存放位置,数据是一个组件在用,还是一些组件在用:

    ​ 1).一个组件在用:放在组件自身即可。

    ​ 2). 一些组件在用:放在他们共同的父组件上(状态提升)。

    ​ (3).实现交互:从绑定事件开始。

  • props适用于:

    ​ (1).父组件 ==> 子组件 通信

    ​ (2).子组件 ==> 父组件 通信(要求父先给子一个函数)

  • 使用v-model时要切记:v-model绑定的值不能是props传过来的值,因为props是不可以修改的!

  • props传过来的若是对象类型的值,修改对象中的属性时Vue不会报错,但不推荐这样做。

webStorage

  • 存储内容大小一般支持5MB左右(不同浏览器可能还不一样)

  • 浏览器端通过 Window.sessionStorageWindow.localStorage 属性来实现本地存储机制。

  • 相关API:

    • xxxxxStorage.setItem('key', 'value'); 该方法接受一个键和值作为参数,会把键值对添加到存储中,如果键名存在,则更新其对应的值。

    • xxxxxStorage.getItem('person');

      ​ 该方法接受一个键名作为参数,返回键名对应的值。

    • xxxxxStorage.removeItem('key');

      ​ 该方法接受一个键名作为参数,并把该键名从存储中删除。

    • xxxxxStorage.clear()

      ​ 该方法会清空存储中的所有数据。

  • 备注:

    • SessionStorage存储的内容会随着浏览器窗口关闭而消失。
    • LocalStorage存储的内容,需要手动清除才会消失。
    • xxxxxStorage.getItem(xxx)如果xxx对应的value获取不到,那么getItem的返回值是null
    • JSON.parse(null)的结果依然是null

JSON.parse()

JSON.stringify()

 1
 2
 3
 4
 5
 6
 7
 8
 9
10
11
12
13
14
15
16
17
18
19
20
21
22
23
24
25
26
27
28
29
30
31
32
33
34
35
36
37
38
39
40
<!--本地存储-->
<!DOCTYPE html>
<html>
    <head>
        <meta charset="UTF-8" />
        <title>localStorage</title>
    </head>
    <body>
        <h2>localStorage</h2>
        <button onclick="saveData()">点我保存一个数据</button>
        <button onclick="readData()">点我读取一个数据</button>
        <button onclick="deleteData()">点我删除一个数据</button>
        <button onclick="deleteAllData()">点我清空一个数据</button>

        <script type="text/javascript" >
            let p = {name:'张三',age:18}

            function saveData(){
                localStorage.setItem('msg','hello!!!')
                localStorage.setItem('msg2',666)
                localStorage.setItem('person',JSON.stringify(p))
            }
            function readData(){
                console.log(localStorage.getItem('msg'))
                console.log(localStorage.getItem('msg2'))

                const result = localStorage.getItem('person')
                console.log(JSON.parse(result))

                // console.log(localStorage.getItem('msg3'))
            }
            function deleteData(){
                localStorage.removeItem('msg2')
            }
            function deleteAllData(){
                localStorage.clear()
            }
        </script>
    </body>
</html>
 1
 2
 3
 4
 5
 6
 7
 8
 9
10
11
12
13
14
15
16
17
18
19
20
21
22
23
24
25
26
27
28
29
30
31
32
33
34
35
36
37
38
39
40
<!--会话存储-->
<!DOCTYPE html>
<html>
    <head>
        <meta charset="UTF-8" />
        <title>sessionStorage</title>
    </head>
    <body>
        <h2>sessionStorage</h2>
        <button onclick="saveData()">点我保存一个数据</button>
        <button onclick="readData()">点我读取一个数据</button>
        <button onclick="deleteData()">点我删除一个数据</button>
        <button onclick="deleteAllData()">点我清空一个数据</button>

        <script type="text/javascript" >
            let p = {name:'张三',age:18}

            function saveData(){
                sessionStorage.setItem('msg','hello!!!')
                sessionStorage.setItem('msg2',666)
                sessionStorage.setItem('person',JSON.stringify(p))
            }
            function readData(){
                console.log(sessionStorage.getItem('msg'))
                console.log(sessionStorage.getItem('msg2'))

                const result = sessionStorage.getItem('person')
                console.log(JSON.parse(result))

                // console.log(sessionStorage.getItem('msg3'))
            }
            function deleteData(){
                sessionStorage.removeItem('msg2')
            }
            function deleteAllData(){
                sessionStorage.clear()
            }
        </script>
    </body>
</html>

组件间通信

组件的自定义事件

  • 一种组件间通信的方式,适用于:子组件 ===> 父组件

  • 使用场景:A是父组件,B是子组件,B想给A传数据,那么就要在A中给B绑定自定义事件(事件的回调在A中)。

  • 绑定自定义事件:

    • 第一种方式,在父组件中:<Demo @atguigu="test"/><Demo v-on:atguigu="test"/>

    • 第二种方式,在父组件中:

1
2
3
4
5
<Demo ref="demo"/>
......
mounted(){
   this.$refs.xxx.$on('atguigu',this.test)
}
  • 若想让自定义事件只能触发一次,可以使用once修饰符,或$once方法。

  • 触发自定义事件:this.$emit('atguigu',数据)

  • 解绑自定义事件this.$off('atguigu')

  • 组件上也可以绑定原生DOM事件,需要使用native修饰符。

  • 注意:通过this.$refs.xxx.$on('atguigu',回调)绑定自定义事件时,回调要么配置在methods中,要么用箭头函数,否则this指向会出问题!

全局事件总线

  • 一种组件间通信的方式,适用于任意组件间通信
  • 安装全局事件总线:
1
2
3
4
5
6
7
new Vue({
	......
	beforeCreate() {
		Vue.prototype.$bus = this //安装全局事件总线,$bus就是当前应用的vm
	},
    ......
}) 
  • 使用事件总线:

    1. 接收数据:A组件想接收数据,则在A组件中给$bus绑定自定义事件,事件的回调留在A组件自身
1
2
3
4
5
6
7
methods(){
  demo(data){......}
}
......
mounted() {
  this.$bus.$on('xxxx',this.demo)
}
  1. 提供数据:this.$bus.$emit('xxxx',数据)

  2. 最好在beforeDestroy钩子中,用$off去解绑当前组件所用到的事件。

消息订阅与发布

  • 一种组件间通信的方式,适用于任意组件间通信

  • 使用步骤:

    • 安装pubsub:npm i pubsub-js
    • 引入: import pubsub from 'pubsub-js'
    • 接收数据:A组件想接收数据,则在A组件中订阅消息,订阅的回调留在A组件自身
1
2
3
4
5
6
7
methods(){
  demo(data){......}
}
......
mounted() {
  this.pid = pubsub.subscribe('xxx',this.demo) //订阅消息
}
  • 提供数据:pubsub.publish('xxx',数据)
  • 最好在beforeDestroy钩子中,用PubSub.unsubscribe(pid)取消订阅

nextTick

  • 语法:this.$nextTick(回调函数)
  • 作用:在下一次 DOM 更新结束后执行其指定的回调。(让vue先渲染页面,再执行nextTick回调函数)
  • 什么时候用:当改变数据后,要基于更新后的新DOM进行某些操作时,要在nextTick所指定的回调函数中执行。
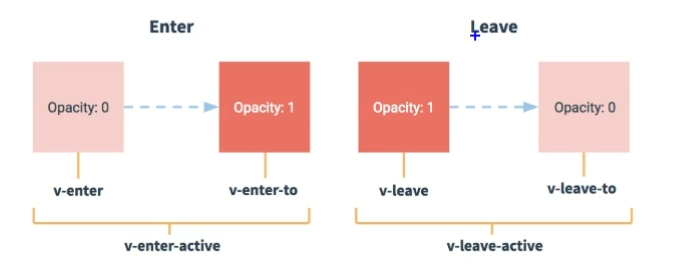
Vue封装的过度与动画

  • 作用:在插入、更新或移除 DOM 元素时,在合适的时候给元素添加样式类名。

  • 图示:

  • 写法:

    • 准备好样式:

      • 元素进入的样式:
        • v-enter:进入的起点
        • v-enter-active:进入过程中
        • v-enter-to:进入的终点
      • 元素离开的样式:
        • v-leave:离开的起点
        • v-leave-active:离开过程中
        • v-leave-to:离开的终点
    • 使用<transition>包裹要过度的元素,并配置name属性:

1
2
3
<transition name="hello">
	<h1 v-show="isShow">你好啊</h1>
</transition>
  • 备注:若有多个元素需要过度,则需要使用:<transition-group>,且每个元素都要指定key值。
最后更新于 Oct 05, 2022 10:01 UTC
Built with Hugo
Theme Stack designed by Jimmy